Práctica 1: Implantación de aplicaciones web PHP
Tarea 0: Preliminares
Paso 1
Mostrar escenario Vagrant
Vagrant.configure("2") do |config|

config.vm.synced_folder ".", "/vagrant", disabled: true

  config.vm.define :implantacionphp do |implantacionphp|
    implantacionphp.vm.box = "debian/bullseye64"
    implantacionphp.vm.hostname = "implantacionphp"
  end

end
Paso 2
Instalar LAMP en esa máquina
sudo apt update && sudo apt -y upgrade
sudo apt install mariadb-server
sudo apt install apache2
sudo chown -R www-data:www-data /var/www/
sudo apt install php libapache2-mod-php php-cli php-fpm php-json php-pdo php-mysql php-zip php-gd php-mbstring php-curl php-xml php-pear php-bcmath
Tarea 1: Instalación de phpBB en servidor local
Paso 1
Crear VirtualHost con
ServerNamewww.adrianjaramillo-phpBB.org
<VirtualHost *:80>
    # The ServerName directive sets the request scheme, hostname and port that
    # the server uses to identify itself. This is used when creating
    # redirection URLs. In the context of virtual hosts, the ServerName
    # specifies what hostname must appear in the request's Host: header to
    # match this virtual host. For the default virtual host (this file) this
    # value is not decisive as it is used as a last resort host regardless.
    # However, you must set it for any further virtual host explicitly.

    ServerName www.adrianjaramillo-phpBB.org
    DocumentRoot /var/www/phpBB

    # Available loglevels: trace8, ..., trace1, debug, info, notice, warn,
    # error, crit, alert, emerg.
    # It is also possible to configure the loglevel for particular
    # modules, e.g.
    #LogLevel info ssl:warn

    ErrorLog ${APACHE_LOG_DIR}/error.log
    CustomLog ${APACHE_LOG_DIR}/access.log combined

    # For most configuration files from conf-available/, which are
    # enabled or disabled at a global level, it is possible to
    # include a line for only one particular virtual host. For example the
    # following line enables the CGI configuration for this host only
    # after it has been globally disabled with "a2disconf".
    #Include conf-available/serve-cgi-bin.conf
</VirtualHost>

# vim: syntax=apache ts=4 sw=4 sts=4 sr noet
Lo habilito:
Reinicio Apache:
Modifico mi /etc/hosts:
Paso 2
Crear BD para phpBB
Paso 3
Crear usuario con permisos sobre
phpBB_db
CREATE USER 'phpBB_user' IDENTIFIED BY '1234';

GRANT USAGE ON *.* TO 'phpBB_user'@localhost IDENTIFIED BY '1234';

GRANT ALL privileges ON `phpBB_db`.* TO 'phpBB_user'@localhost;

FLUSH PRIVILEGES;
Paso 4
Descargar phpBB
sudo apt install unzip
sudo wget https://download.phpbb.com/pub/release/3.3/3.3.5/phpBB-3.3.5.zip
sudo unzip phpBB-3.3.5.zip
sudo mv phpBB3 phpBB
Todo este proceso lo hago sobre /var/www, para que el directorio resultante coincida con el DocumentRoot del VirtualHost previamente configurado.
Paso 5
Instalación de phpBB
Credenciales para el usuario administrador:
- Usuario: admin
- Contraseña: admin1
- Correo: adristudy@gmail.com

Introducimos los datos de conexión con la BD:

Configuración del servidor:

Configuración de email:

Configuración del tablón:

Proceso de instalación completado:

Vemos que phpBB ya está funcionando:

Tal como nos indica en ese mensaje, es importante que borremos el directorio install
A partir de ahora, sí que está funcionando phpBB completamente:

Paso 6
Cambiar el tema
Descargo el tema "Ultra Light":
Descomprimo el tema en el directorio requerido:
Compruebo la estructura del tema para ver que se haya descomprimido correctamente:
vagrant@implantacionphp:/var/www/phpBB/styles/ultra_light$ ls -la
total 36
drwxr-xr-x 4 root     root      4096 Oct 28 07:36 .
drwxr-xr-x 5 www-data www-data  4096 Oct 28 07:36 ..
-rw-rw-rw- 1 root     root     15405 Oct  4 09:26 license.txt
-rw-rw-rw- 1 root     root       938 Oct  4 09:26 style.cfg
drwxr-xr-x 2 root     root      4096 Oct 28 07:36 template
drwxr-xr-x 5 root     root      4096 Oct 28 07:36 theme
En nuestro ACP (panel de administración), instalamos el tema:

Se instaló correctamente:

En el ACP, dentro de General -> Board Configuration -> Board settings, aplicamos el nuevo tema:

Muestro que ya funciona:

Paso 7
Crear contenido
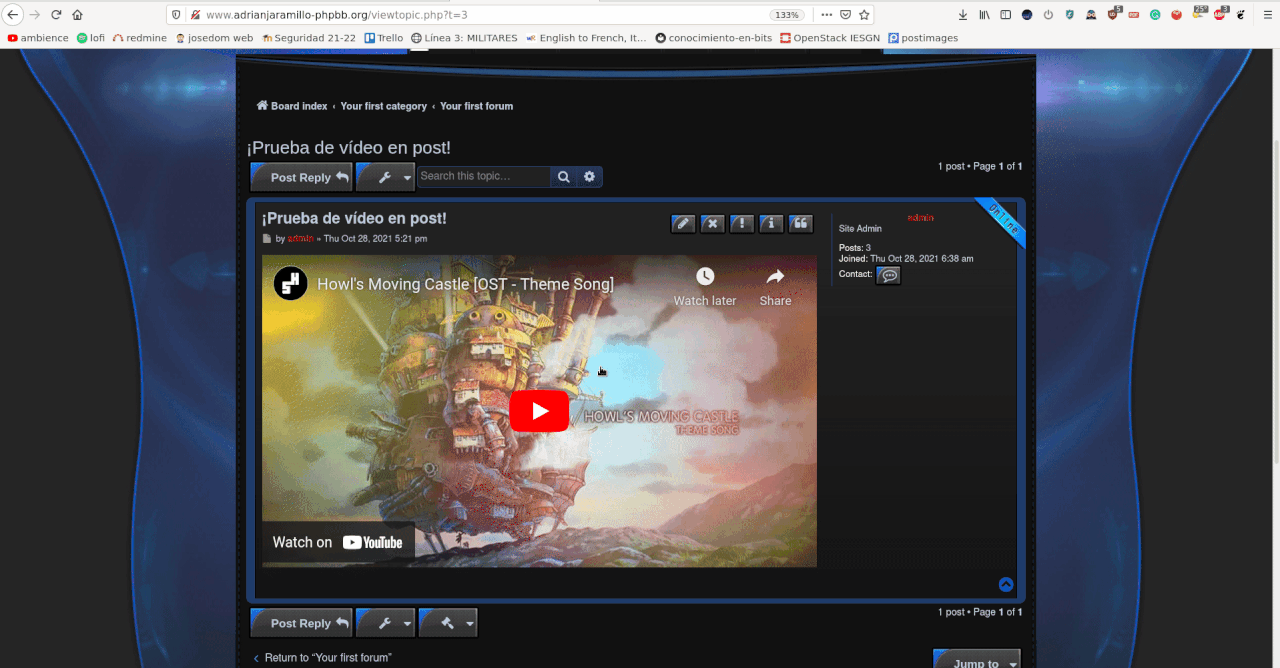
Hago un post de prueba en el foro:

Paso 8
Instalar una extensión a phpBB
Descargo la extensión "Media Embed PlugIn":
Descomprimo la extensión en el directorio requerido:
Compruebo que se haya descomprimido correctamente:
vagrant@implantacionphp:/var/www/phpBB/ext/phpbb/mediaembed$ ls -la
total 80
drwxr-xr-x 12 root     root      4096 Oct 28 09:06 .
drwxr-xr-x  4 www-data www-data  4096 Oct 28 09:06 ..
-rw-rw-rw-  1 root     root      2392 Aug 14  2020 CHANGELOG.md
drwxr-xr-x  2 root     root      4096 Oct 28 09:06 acp
drwxr-xr-x  3 root     root      4096 Oct 28 09:06 adm
drwxr-xr-x  2 root     root      4096 Oct 28 09:06 cache
drwxr-xr-x  3 root     root      4096 Oct 28 09:06 collection
-rw-rw-rw-  1 root     root      1631 Aug 14  2020 composer.json
drwxr-xr-x  2 root     root      4096 Oct 28 09:06 config
drwxr-xr-x  2 root     root      4096 Oct 28 09:06 cron
drwxr-xr-x  2 root     root      4096 Oct 28 09:06 event
-rw-rw-rw-  1 root     root      1946 Aug 14  2020 ext.php
drwxr-xr-x 19 root     root      4096 Oct 28 09:06 language
-rw-rw-rw-  1 root     root     18092 Aug 14  2020 license.txt
drwxr-xr-x  2 root     root      4096 Oct 28 09:06 migrations
drwxr-xr-x  3 root     root      4096 Oct 28 09:06 styles
En nuestro ACP, habilitamos la extensión:

Mi extensión añadida posibilita los vídeos embebidos en los posts.
Muestro que funciona:
Tarea 2: Configuración multinodo
Paso 1
Realizar backup de la base de datos
Paso 2
Crear otra máquina Vagrant, conectada con una red interna a la anterior
Vagrantfile actualizado:
Vagrant.configure("2") do |config|

config.vm.synced_folder ".", "/vagrant", disabled: true

  config.vm.define :implantacionphp do |implantacionphp|
    implantacionphp.vm.box = "debian/bullseye64"
    implantacionphp.vm.hostname = "implantacionphp"
    implantacionphp.vm.network :private_network,
      :libvirt__network_name => "implantacionphpnet",
      :libvirt__dhcp_enabled => false,
      :ip => "10.0.0.2",
      :libvirt__forward_mode => "veryisolated"
  end

  config.vm.define :dbserver do |dbserver|
    dbserver.vm.box = "debian/bullseye64"
    dbserver.vm.hostname = "dbserver"
    dbserver.vm.network :private_network,
      :libvirt__network_name => "implantacionphpnet",
      :libvirt__dhcp_enabled => false,
      :ip => "10.0.0.3",
      :libvirt__forward_mode => "veryisolated"
  end

end
Paso 3
Instalar
mariadb-servery crear la BD en la segunda máquina
Paso 4
Crear usuario con privilegios sobre la nueva BD
CREATE USER 'phpBB_user' IDENTIFIED BY '1234';

GRANT USAGE ON *.* TO 'phpBB_user'@'%' IDENTIFIED BY '1234';

GRANT ALL privileges ON `phpBB_db`.* TO 'phpBB_user'@'%';

FLUSH PRIVILEGES;
Paso 5
Restaurar la backup en la nueva BD
Paso 6
Habilitar conexiones remotas en el nuevo servidor de BD
En /etc/mysql/mariadb.conf.d/50-server.cnf modificar:
Reiniciar mariadb:
Paso 7
Desinstalar mariadb en el servidor principal
Paso 8
Modificar
config.phpcon los nuevos datos de conexión a la BD
<?php
// phpBB 3.3.x auto-generated configuration file
// Do not change anything in this file!
$dbms = 'phpbb\\db\\driver\\mysqli';
$dbhost = '10.0.0.3';
$dbport = '';
$dbname = 'phpBB_db';
$dbuser = 'phpBB_user';
$dbpasswd = '1234';
$table_prefix = 'phpbb_';
$phpbb_adm_relative_path = 'adm/';
$acm_type = 'phpbb\\cache\\driver\\file';

@define('PHPBB_INSTALLED', true);
@define('PHPBB_ENVIRONMENT', 'production');
// @define('DEBUG_CONTAINER', true);
Solamente hemos modificado la variable $dbhost, porque lo único que ha cambiado de la BD es la ubicación.
Paso 9
Mostrar de nuevo phpBB funcionando

La única diferencia es que ahora, se accede a la BD remotamente.
Tarea 3: Instalación de ConcreteCMS
Paso 1
Configurar otro VirtualHost, ahora con
ServerNamewww.adrianjaramillo-concretecms.org
<VirtualHost *:80>
    # The ServerName directive sets the request scheme, hostname and port that
    # the server uses to identify itself. This is used when creating
    # redirection URLs. In the context of virtual hosts, the ServerName
    # specifies what hostname must appear in the request's Host: header to
    # match this virtual host. For the default virtual host (this file) this
    # value is not decisive as it is used as a last resort host regardless.
    # However, you must set it for any further virtual host explicitly.

    ServerName www.adrianjaramillo-concretecms.org
    DocumentRoot /var/www/ConcreteCMS

    # Available loglevels: trace8, ..., trace1, debug, info, notice, warn,
    # error, crit, alert, emerg.
    # It is also possible to configure the loglevel for particular
    # modules, e.g.
    #LogLevel info ssl:warn

    ErrorLog ${APACHE_LOG_DIR}/error.log
    CustomLog ${APACHE_LOG_DIR}/access.log combined

    # For most configuration files from conf-available/, which are
    # enabled or disabled at a global level, it is possible to
    # include a line for only one particular virtual host. For example the
    # following line enables the CGI configuration for this host only
    # after it has been globally disabled with "a2disconf".
    #Include conf-available/serve-cgi-bin.conf
</VirtualHost>

# vim: syntax=apache ts=4 sw=4 sts=4 sr noet
Lo habilito:
Reinicio Apache:
Modifico mi /etc/hosts:
# practica-implantacion-apps-php resolutions
192.168.121.31 www.adrianjaramillo-phpBB.org
192.168.121.31 www.adrianjaramillo-concretecms.org
Paso 2
Crear BD para ConcreteCMS
Paso 3
Crear usuario con permisos sobre
ConcreteCMS_db
CREATE USER 'ConcreteCMS_user' IDENTIFIED BY '1234';

GRANT USAGE ON *.* TO 'ConcreteCMS_user'@'%' IDENTIFIED BY '1234';

GRANT ALL privileges ON `ConcreteCMS_db`.* TO 'ConcreteCMS_user'@'%';

FLUSH PRIVILEGES;
Paso 4
Descargar ConcreteCMS
sudo wget https://www.concretecms.com/download_file/61dab82f-fb01-47bc-8cf1-deffff890224
sudo unzip 61dab82f-fb01-47bc-8cf1-deffff890224
sudo mv concrete5-8.5.6 ConcreteCMS
Todo este proceso lo hago sobre /var/www, para que el directorio resultante coincida con el DocumentRoot del VirtualHost previamente configurado.
ConcreteCMS va a necesitar escribir sobre su DocumentRoot, así que cambiamos los propietarios a www-data:
Paso 5
Instalación de ConcreteCMS
Accedemos a www.adrianjaramillo-concretecms.org y comenzamos:

Tenemos todos los requerimientos, así que podemos seguir.
Datos de la cuenta admin introducidos:
- Email: adristudy@gmail.com
- Username: admin (no aparece en la instalación, pero es así)
- Password: admin
Datos de conexión a la BD introducidos:
- Server: 10.0.0.3
- Username: ConcreteCMS_user
- Password: 1234
- Database Name: ConcreteCMS_db
Esos datos son los que añado en la instalación:

ConcreteCMS se empieza a instalar:

Instalación completada:

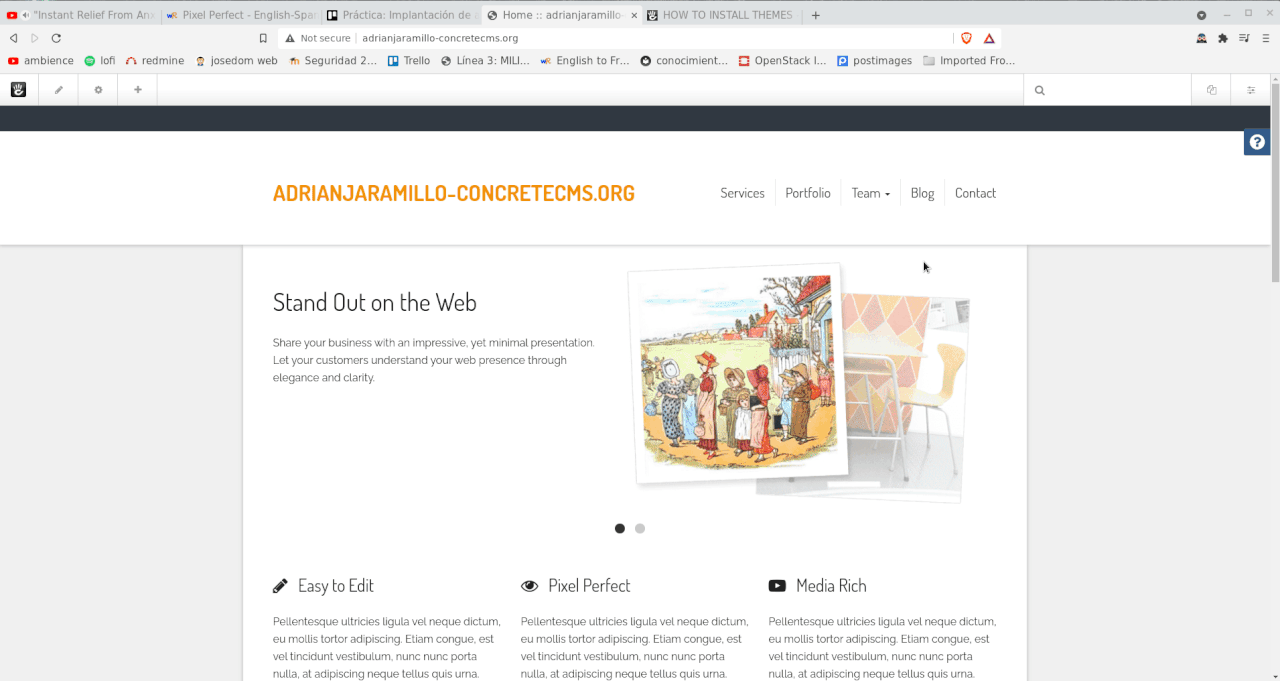
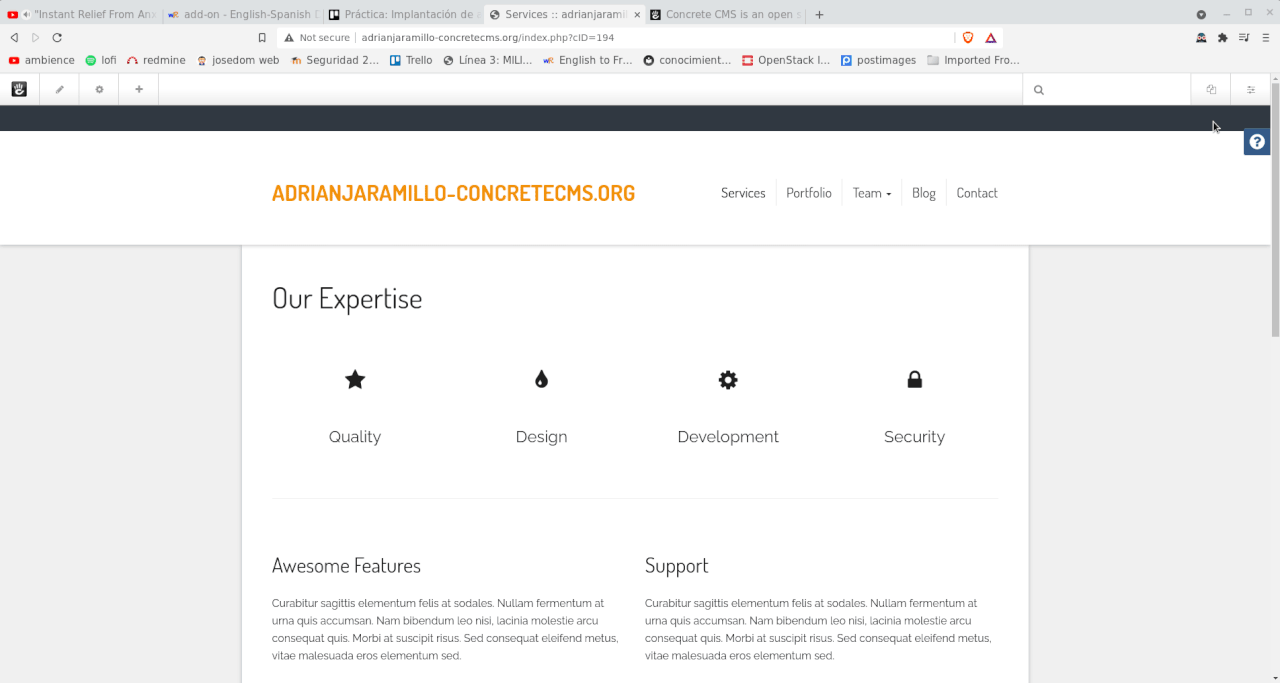
Vemos que la web funciona:

Paso 6
Cambiar el tema
Paso el zip de mi máquina al home de la VM:
No he podido pasar el zip directamente al directorio requerido, porque el usuario Vagrant no tiene permiso de escritura allí.
Extraigo el zip en el directorio requerido:
Para instalarlo, hacemos lo siguiente:
Para activarlo, hacemos lo siguiente:
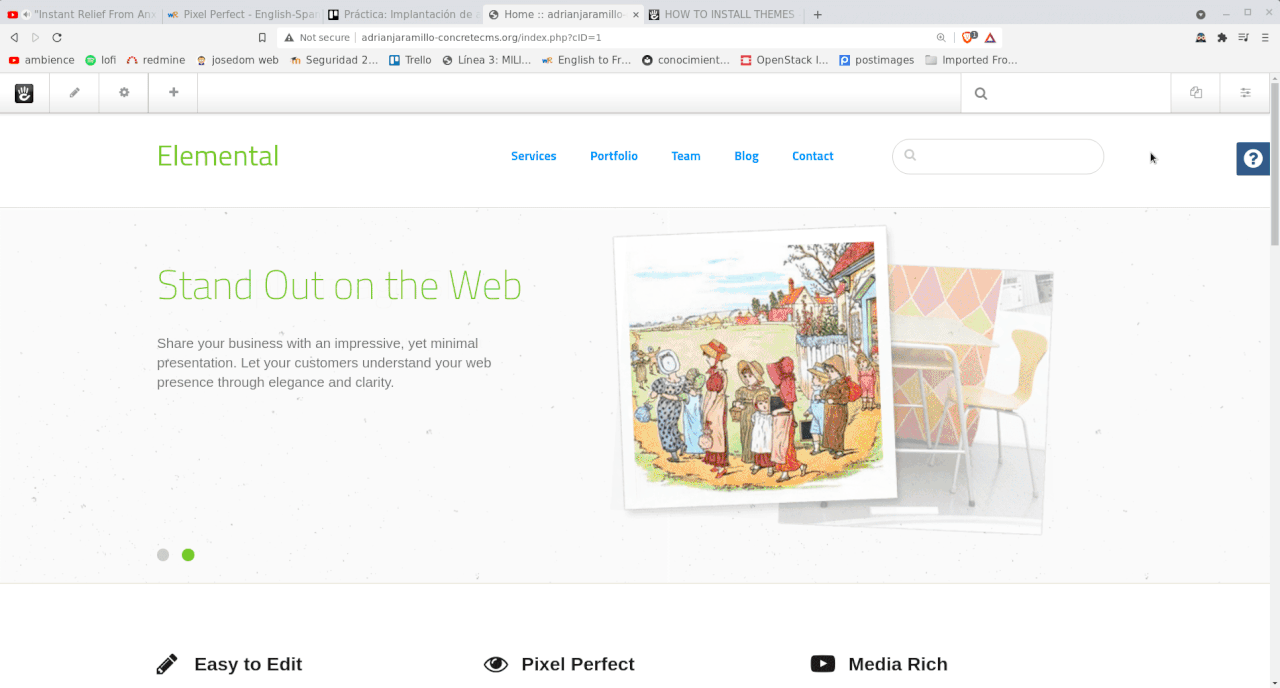
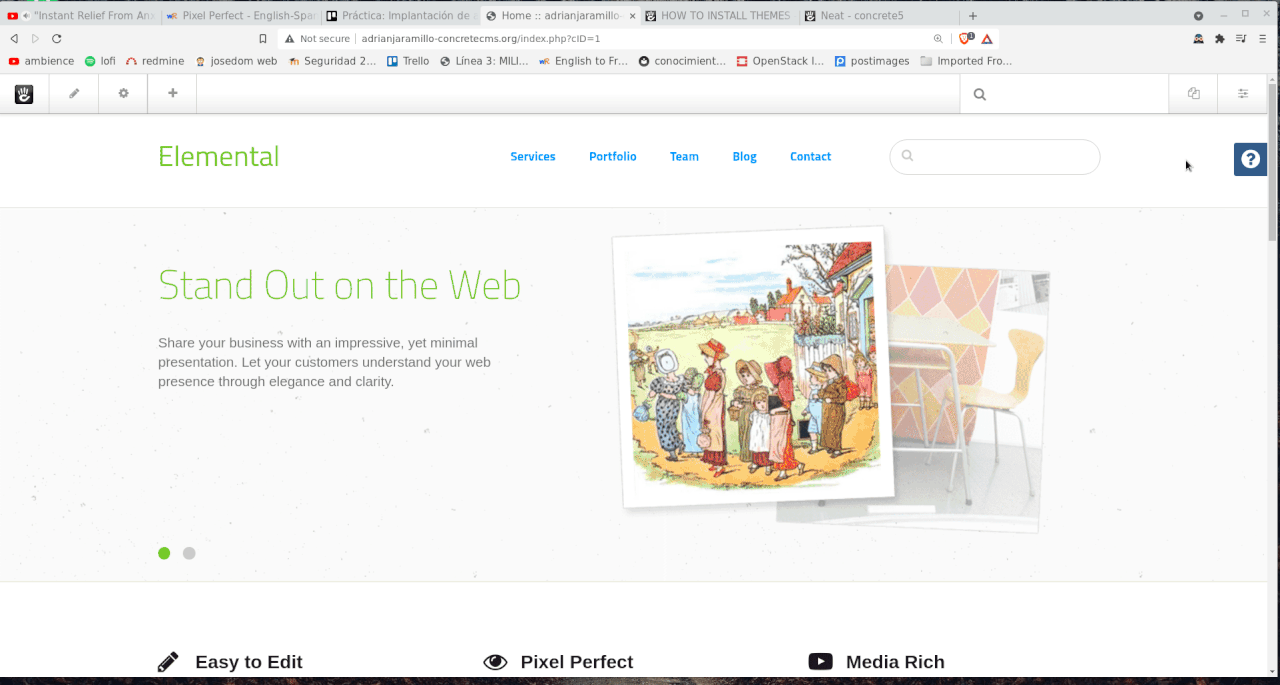
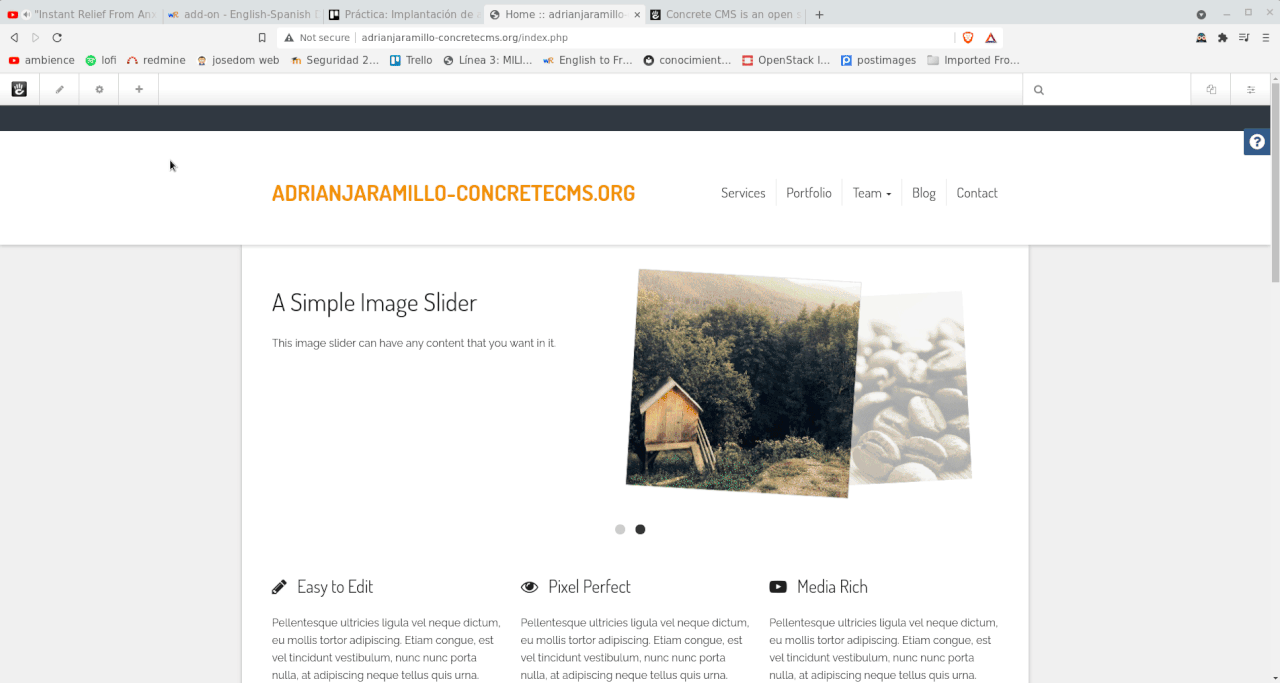
Vemos que el tema se ha aplicado:

Paso 7
Crear contenido
He creado una entrada en el blog, y muestro que funciona:
Paso 8
Instalar un add-on en ConcreteCMS
Paso el zip de mi máquina al home de la VM:
Extraigo el zip en el directorio requerido:
Instalo el add-on:
Lo añado a la web:
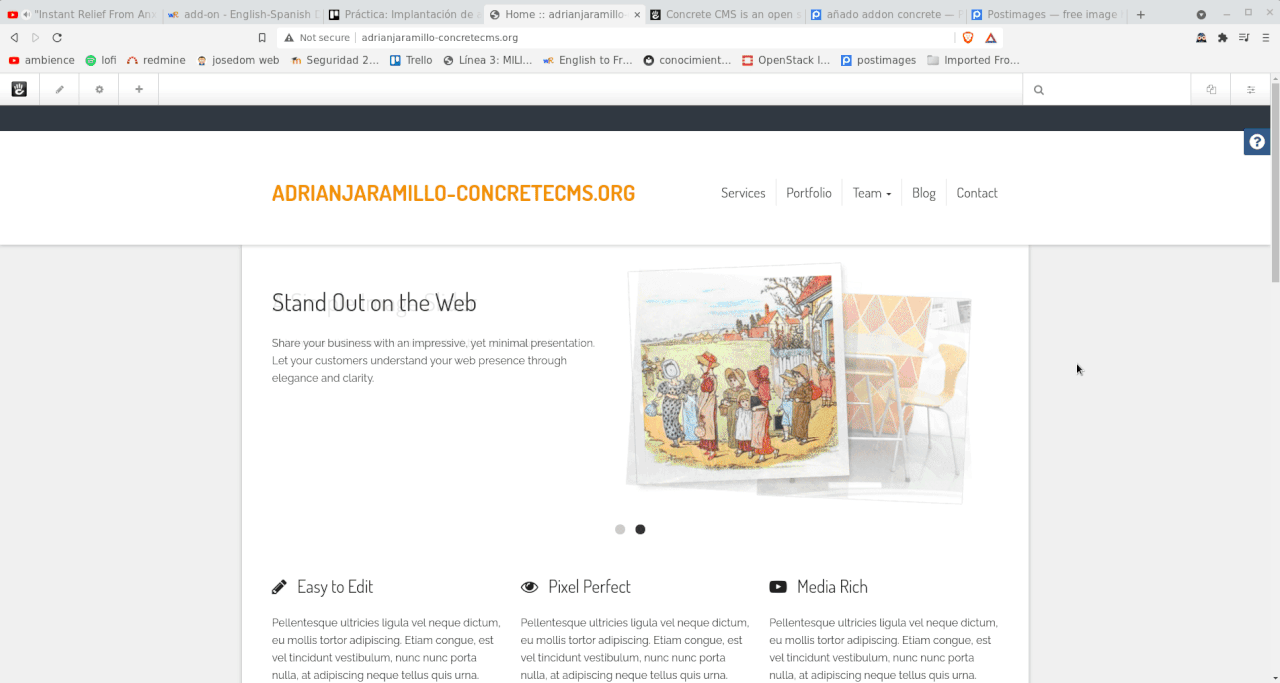
Muestro que funciona:
Tarea 4: Migración de ConcreteCMS a hosting
Paso 1
Eligir un servicio de hosting con PHP y base de datos
Paso 2
Crear un subdominio gratuito

Paso 3
Subir todo el DocumentRoot de ConcreteCMS usando FTP
Instalo un cliente FTP:
Las credenciales FTP que me ofrece el hosting son las siguientes:
- FTP Username: 3976052
- FTP Password: concretecmsadmin1 (cambiada por mí)
- Hostname: concretecms.atwebpages.com
Subo todo el DocumentRoot al directorio remoto (nos pregunta la contraseña antes de empezar a subir ficheros):
ncftpput -R -v -u "3976052" concretecms.atwebpages.com /concretecms.atwebpages.com /var/www/ConcreteCMS/*
Paso 4
Crear BD
Introduzco lo siguiente en el hosting para crear la BD:

Ya la tengo creada:

Mi hosting por motivos de seguridad no permite las conexiones remotas a la BD, así que...
Exporto la BD:
Paso el fichero a mi máquina:
Importo la BD en mi hosting:

Paso 5
Modificar los datos de conexión a la BD
Modifico el fichero application/config/database.php en el hosting de la siguiente manera:

Paso 6
Borrar el directorio
application/files/cache/en el hosting
Este paso es MUY IMPORTANTE, porque tal y como dicen en la documentación oficial de Concrete CMS sobre mover un site...

Si no borramos ese directorio con caché, nuestra web no funcionará.
Paso 7
Mostrar la web funcionando en el hosting
